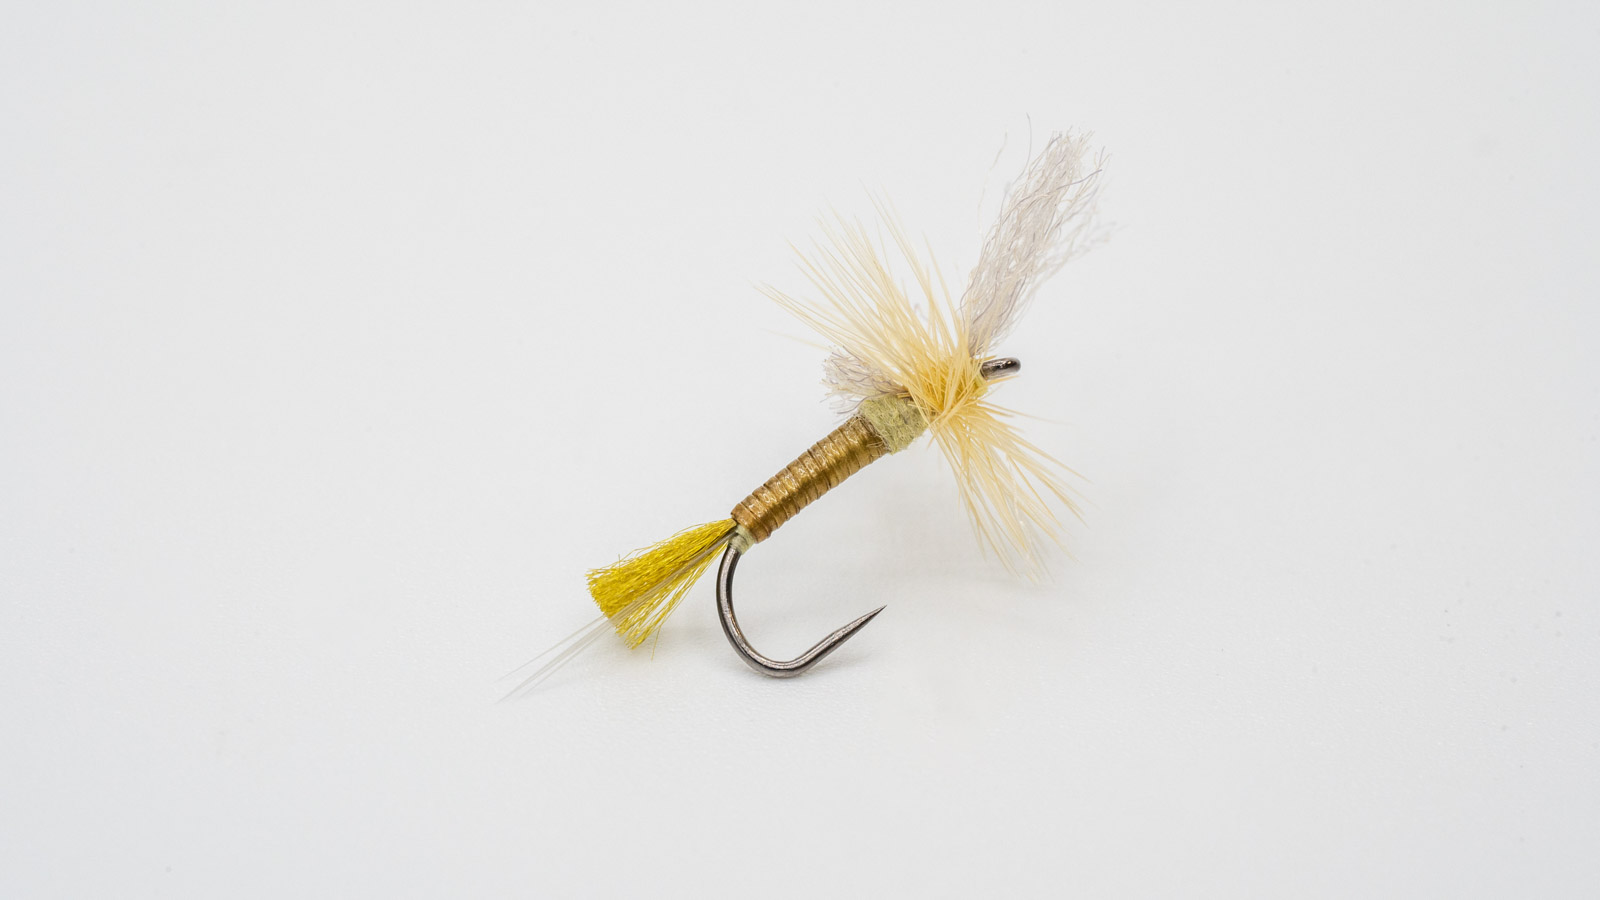
Fly Tying: Cripple Mayfly Dry
by Drew Daniels
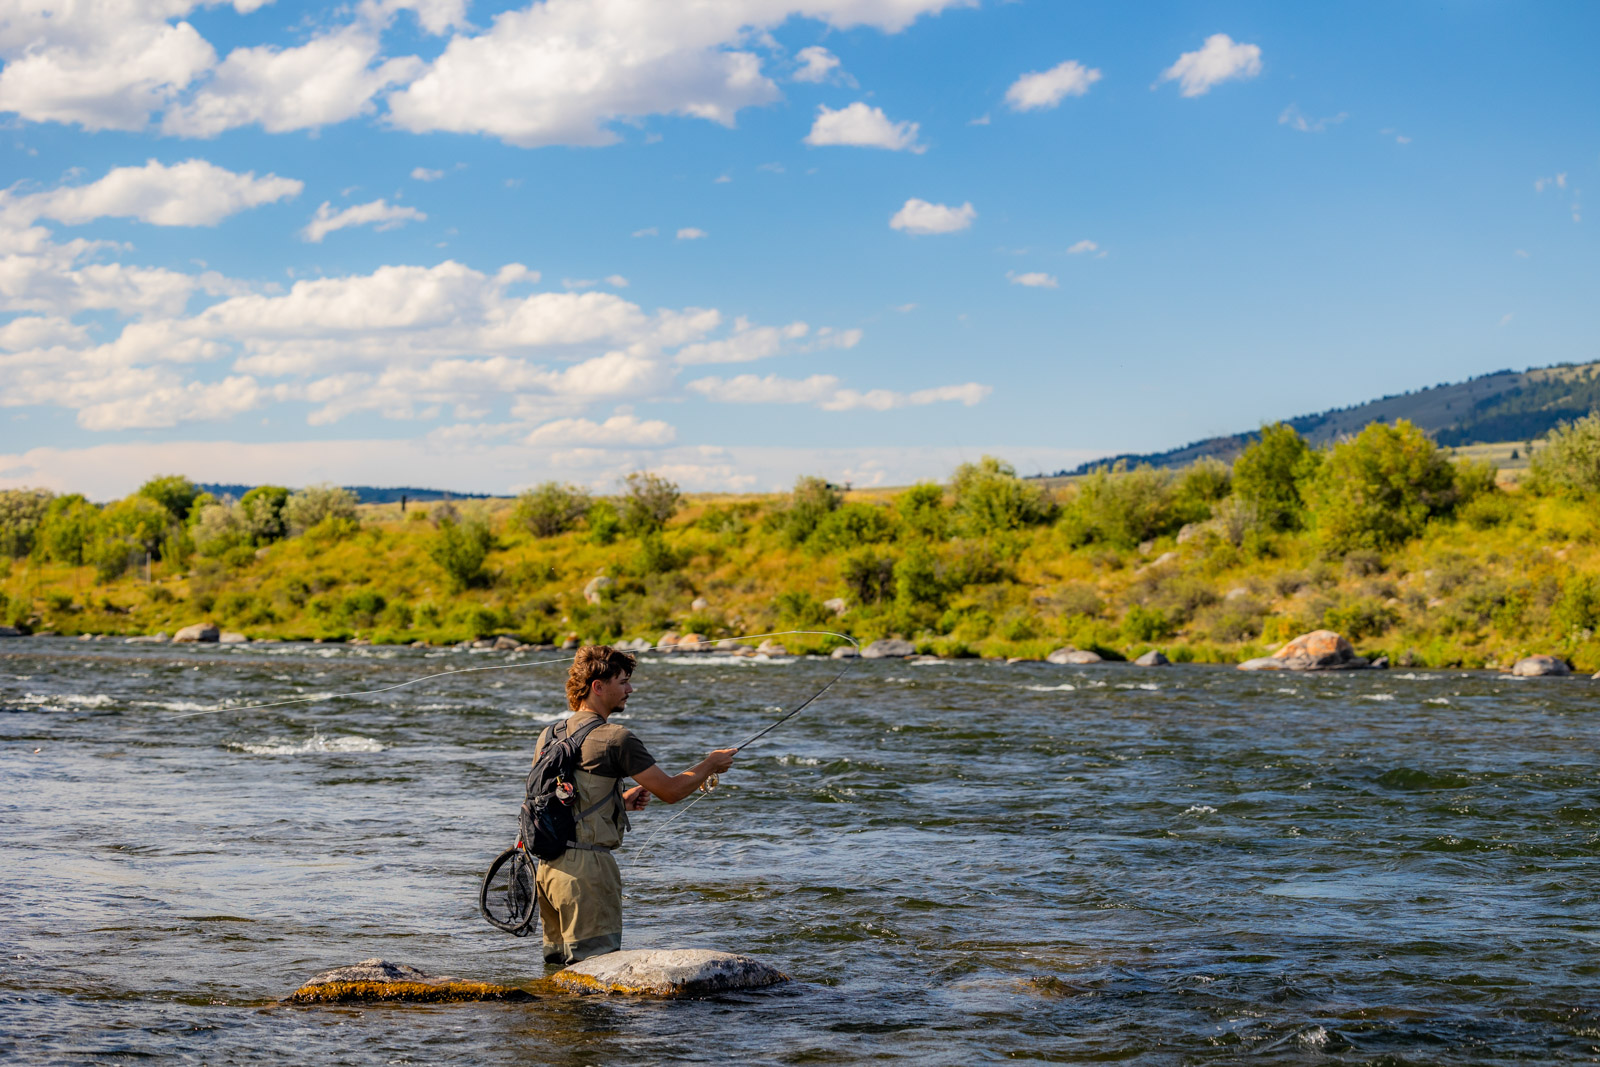
As water temps rise in the spring, bug activity increases, and trout take note. Throughout the spring, summer, and fall we get tons of different mayfly hatches, ranging from as big as a size 10 all the way down to the smallest of small. This pattern is a mashup of a couple of my favorite cripple-style mayflies and can be tied in a range of sizes and colors. Two great variations are a large brown for drakes and March Browns, and a size 16 in pale yellow for PMDs.
Materials
Hook: Ahrex 502 or TMC 100, 10-22
Thread: Semperfli Classic Waxed 12/0
Tail: Microfibbets
Trailing Shuck: UV2 Sparkle Yarn
Body: Micro Stretch Tubing
Thorax: Superfine Dubbing
Wing: EP Trigger Point
Hackle: Hackle Cape appropriately sized to hook
Instructions
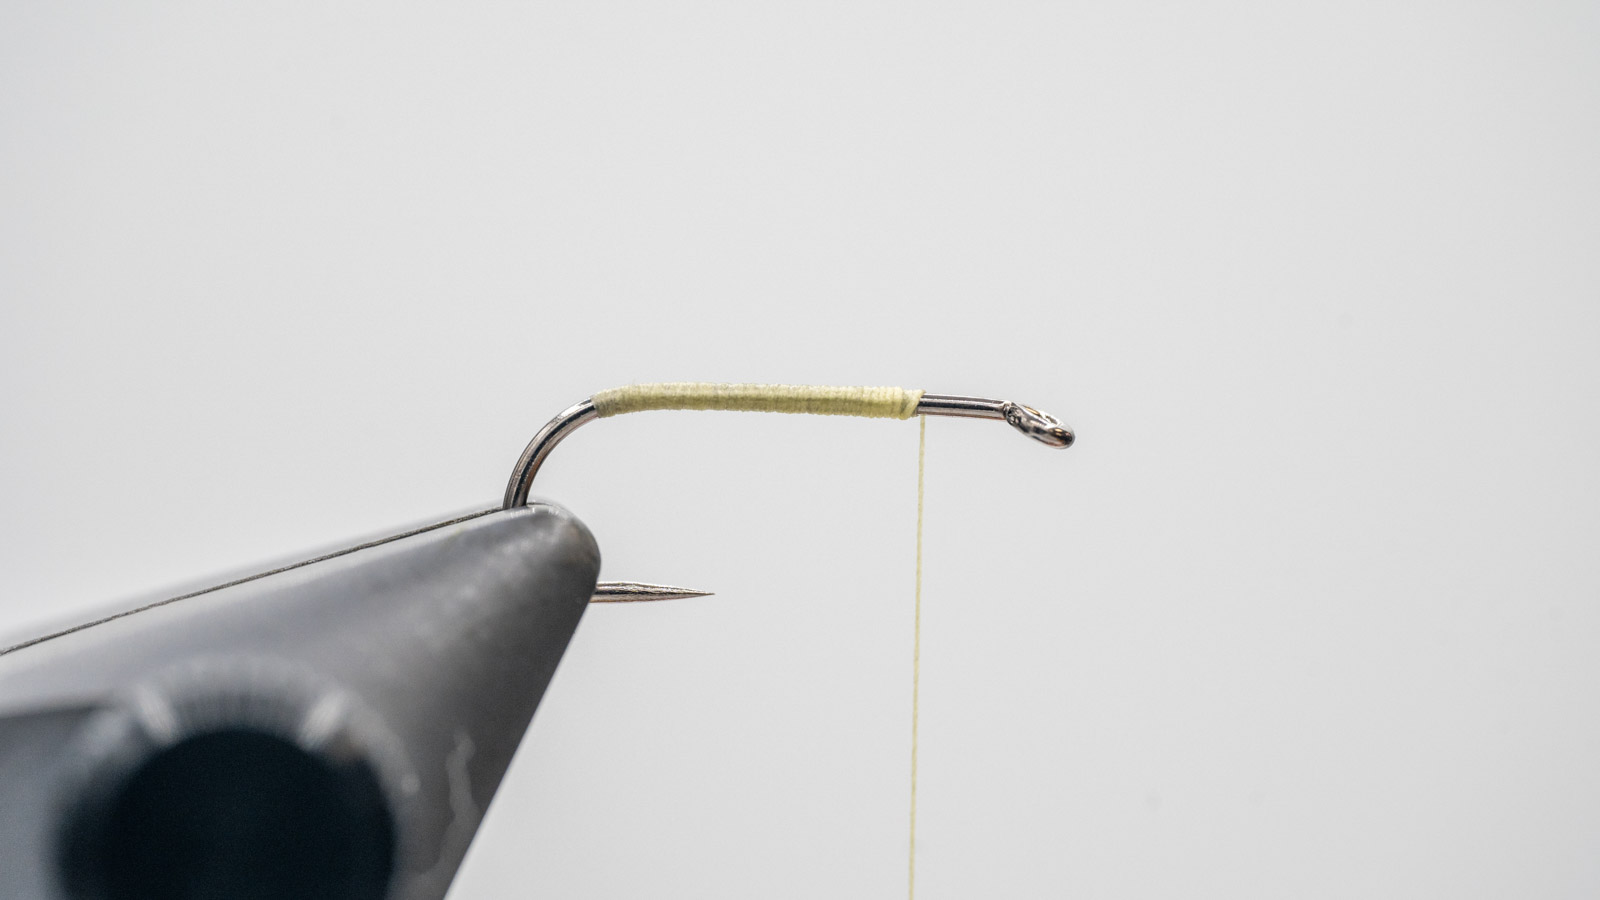
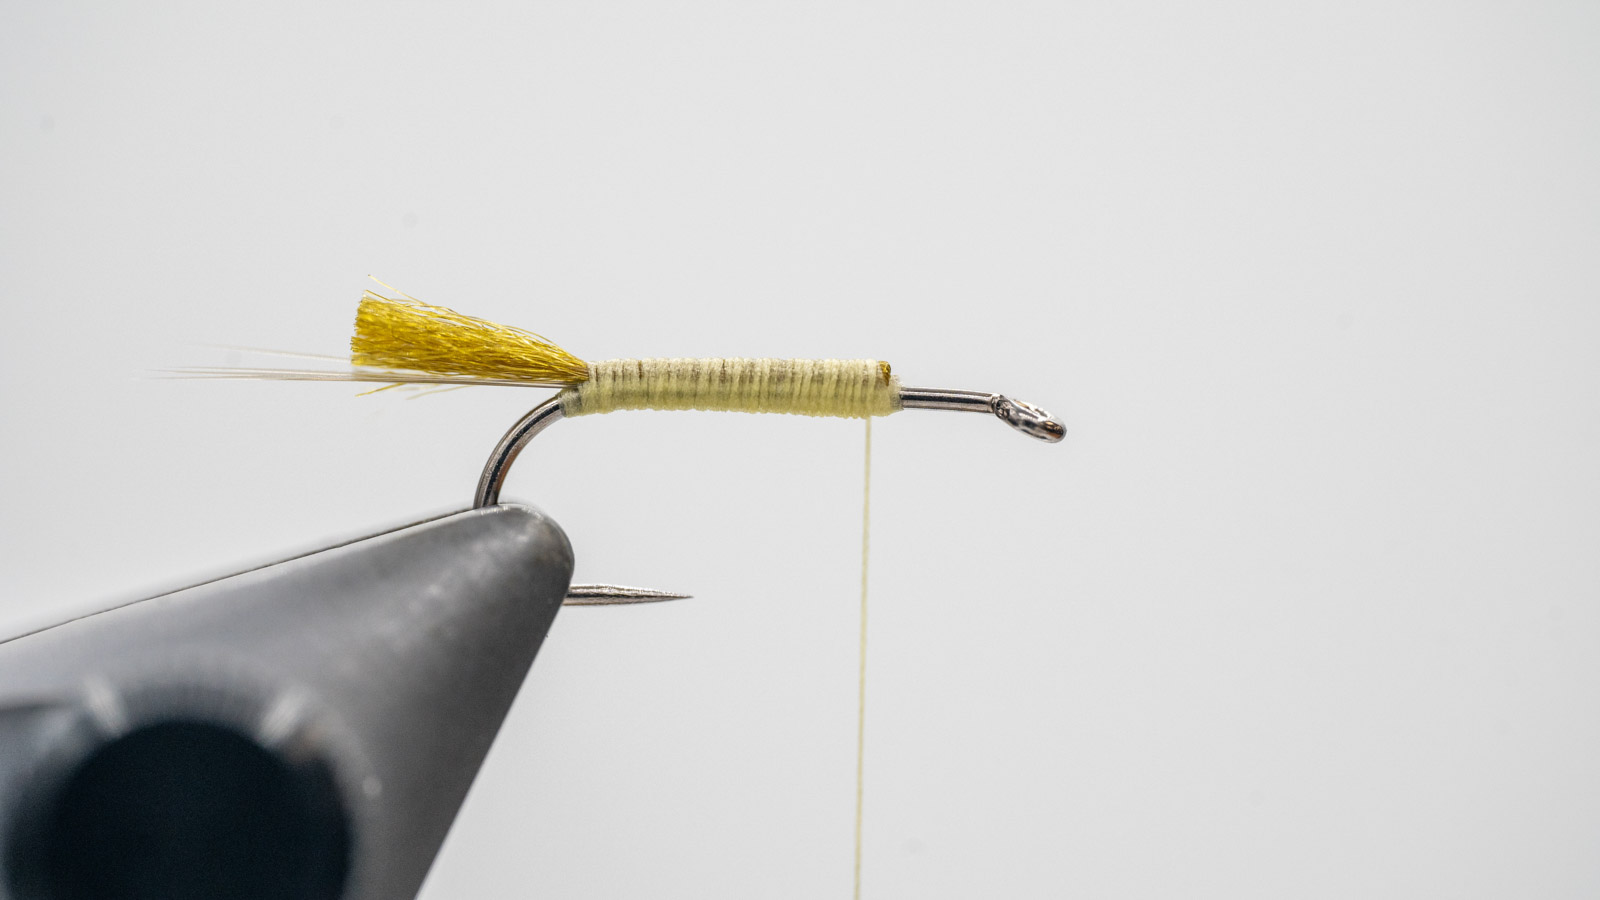
- Place the hook securely in the jaws of your vise and start the thread a quarter of the way down the shank. Using touching wraps, advance the thread down a bit into the bend of the hook, then using touching wraps, return the thread to the initial starting point.
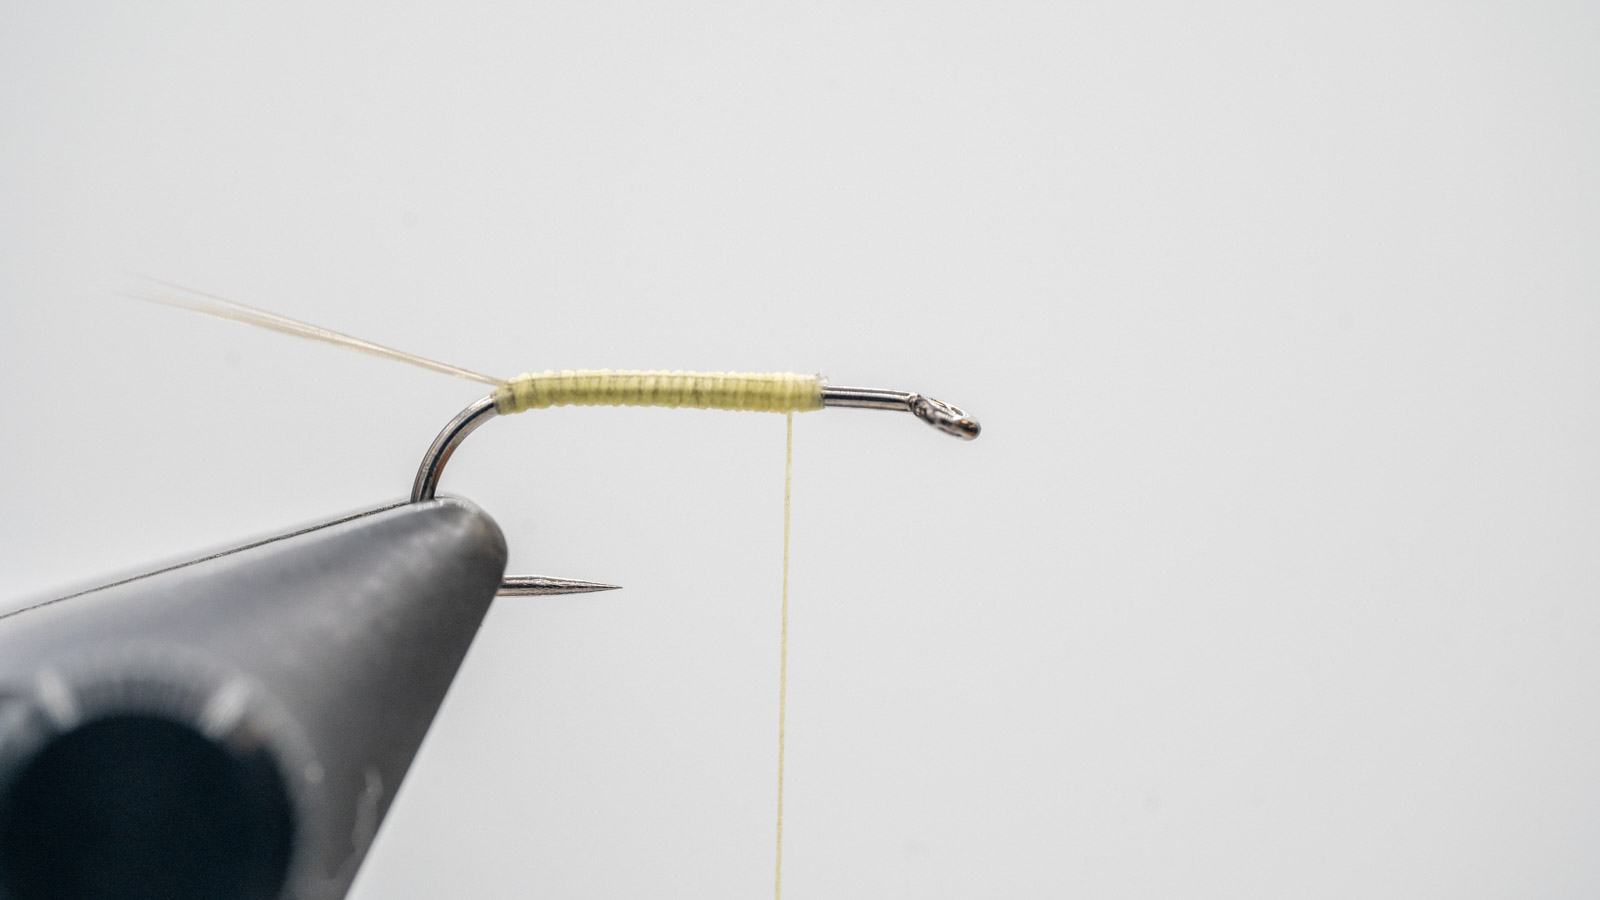
- Isolate four microfibbets from the clump and trim them free, then measure a tail about three-quarters the length of the hook shank. Transfer this measurement rearward and tie the tail in, down the top of the hook shank to where the thread stops. You’ll notice here that the tail is sticking down. Wrap two or three turns of tying thread under the tail to prop the fibers up, then return the thread back to the initial tie-in point and trim the excess free from the fibbets.
- Trim a strand of the sparkle yarn free and split it in half so you’re left with two strands of sparkle yarn. Then tie one of the stands down the top of the hook shank to where the tail is tied in. Trim the sparkle yarn to about half the length of the tail, then advance the thread back to the initial tie-in point.
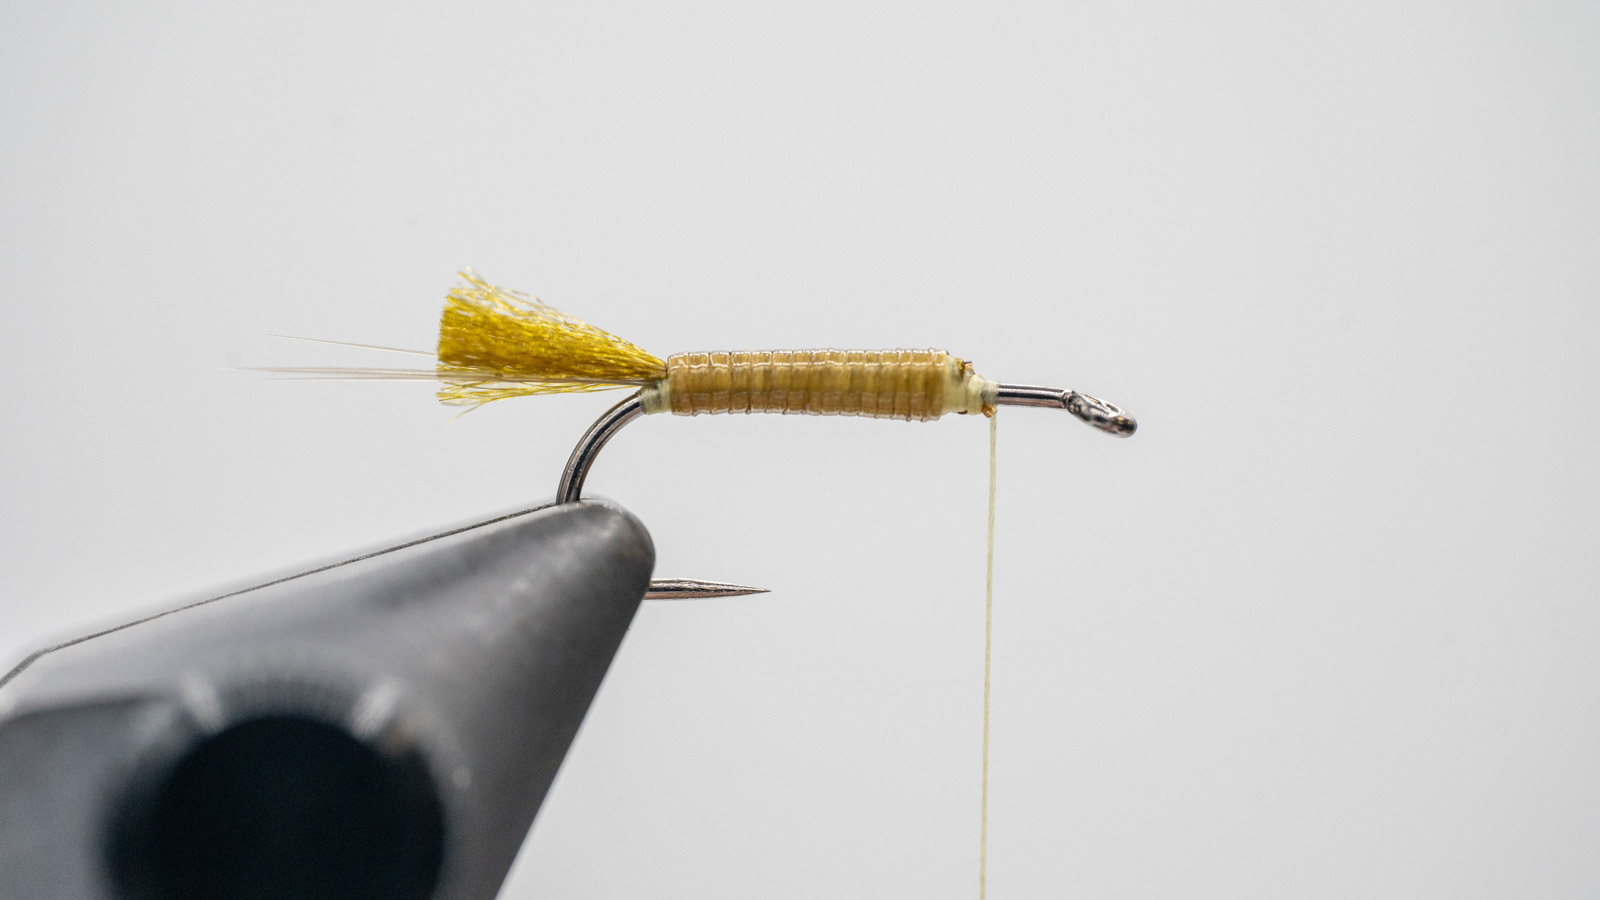
- Cut a five-inch piece of the body tubing, then tie it to the far side of the hook shank and stretch it rearward. Tie down the shank over the stretched body tubing using touching wraps to ensure a smooth underbody. Then, return the thread back to the initial tie-in point. Gently stretch the body tubing and wrap it forward using touching wraps to where your thread hangs. Then securely tie off the tubing and cut the excess free.
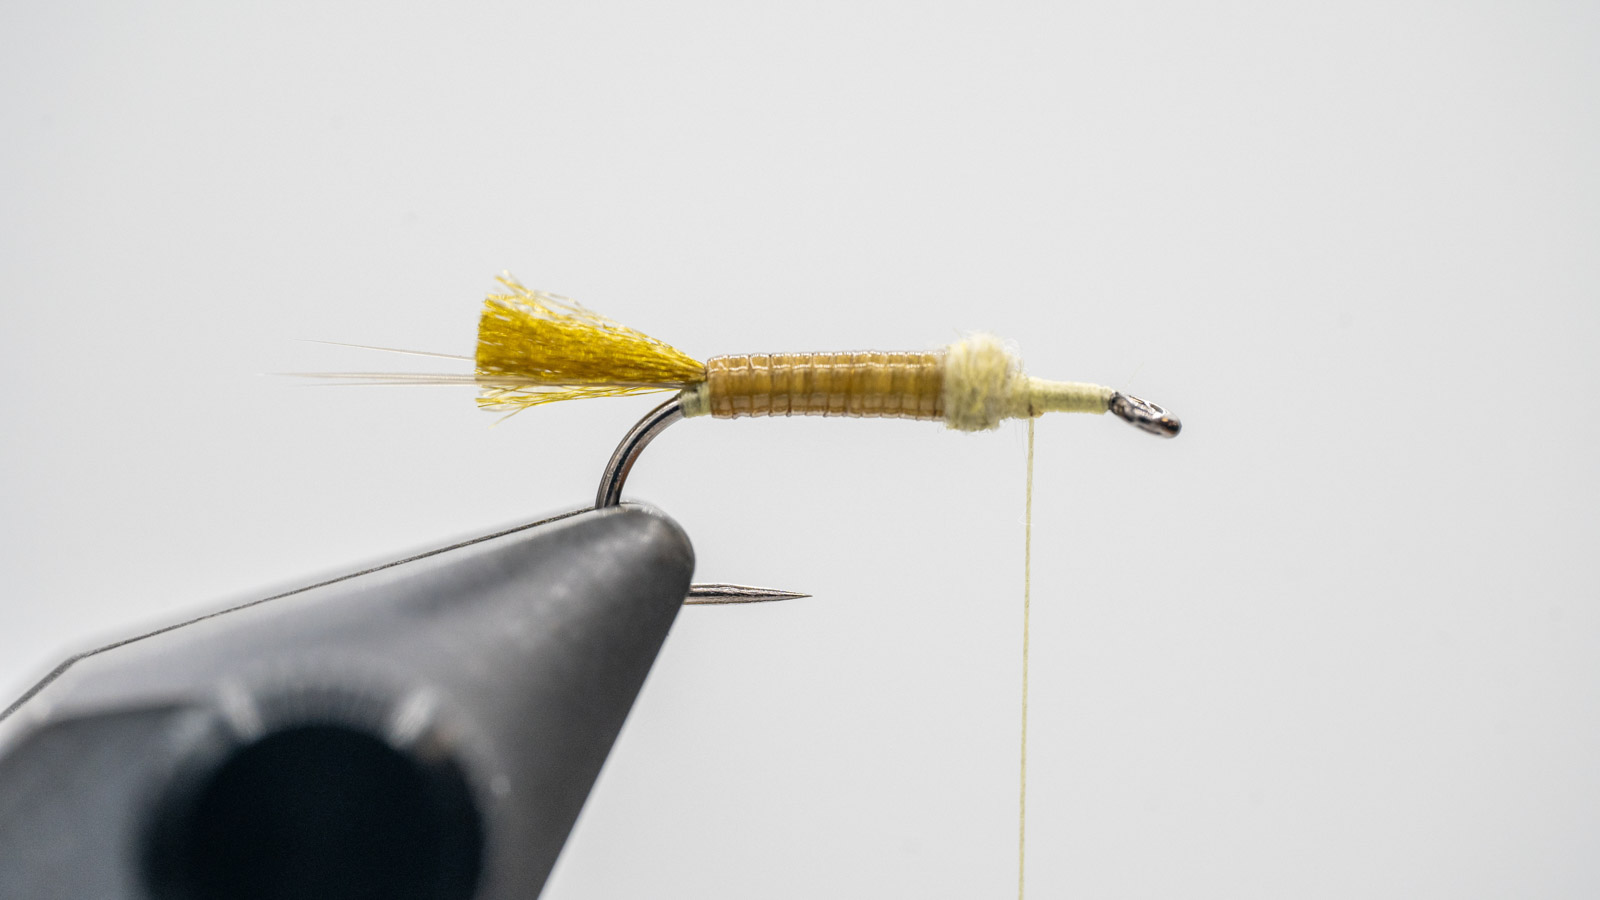
- Take a small pinch of superfine dubbing and create a short, thin dubbing noodle. Now wrap the dubbing over itself at the one-quarter point of the hook shank to create a dubbing ball that slightly overlaps the tubing body and end with your thread directly in front of the dubbing ball.
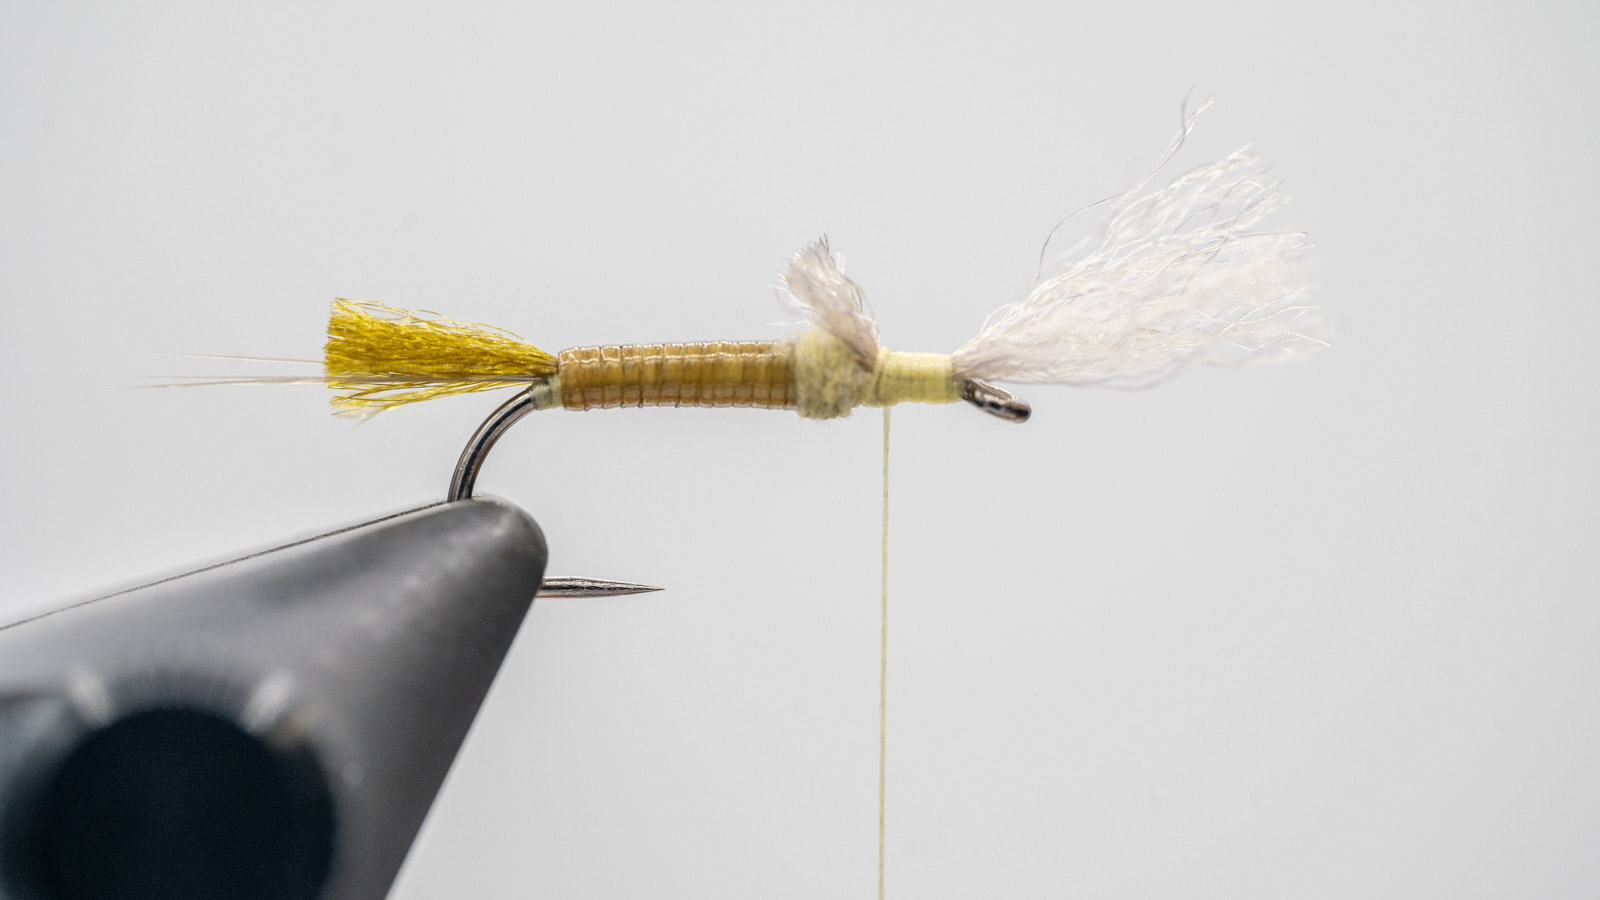
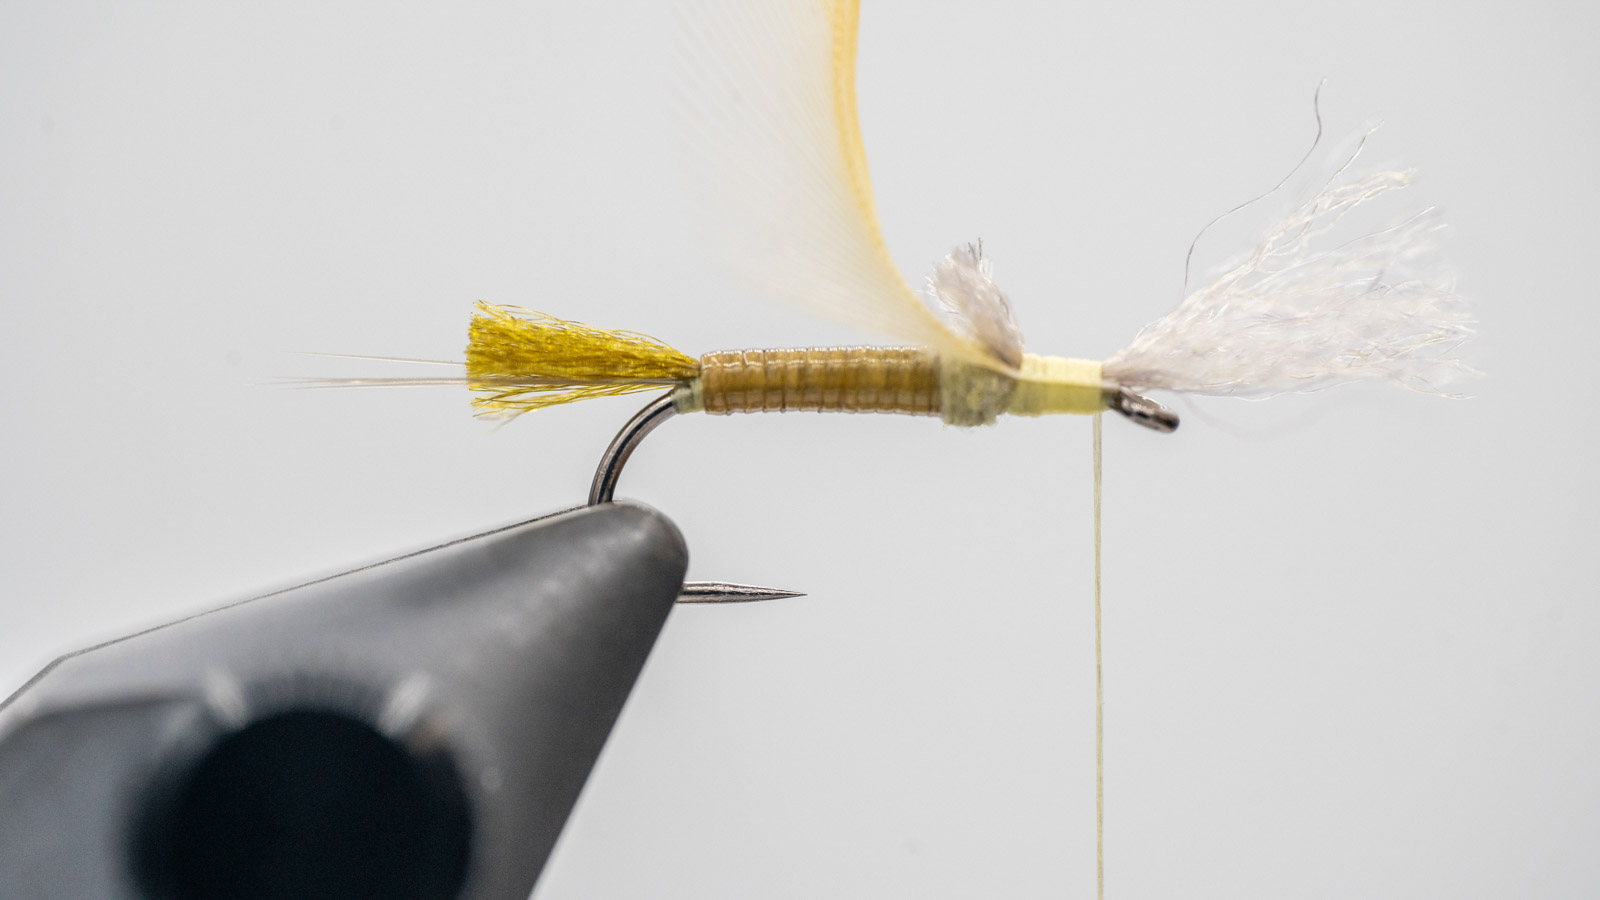
- Cover the bare hook shank between the dubbing ball and the hook eye with tying thread using tight wraps, then return the thread to behind the dubbing ball. Trim a clump of EP Trigger Point, about half the diameter of a pencil, free from the hank. Tie the clump of trigger point to the top of the hook with the longer side of the clump facing forward and the butts of the clump extending rearward to the same length of the thorax. Wrap thread forward over the Trigger Pont fiber to just behind the hook eye. Then trim the trigger-point wing so it extends forward about the same length as the body of the fly.
- Using your hackle gauge, measure a feather slightly oversized for the hook you are tying on and pluck it free from the skin. Trim off the webby fibers from the base of the feather and then strip away about an eighth-inch of fibers from the stem to create a smooth tie-in. Then, tie the feather in and return the thread directly behind the wing’s base and hook eye.
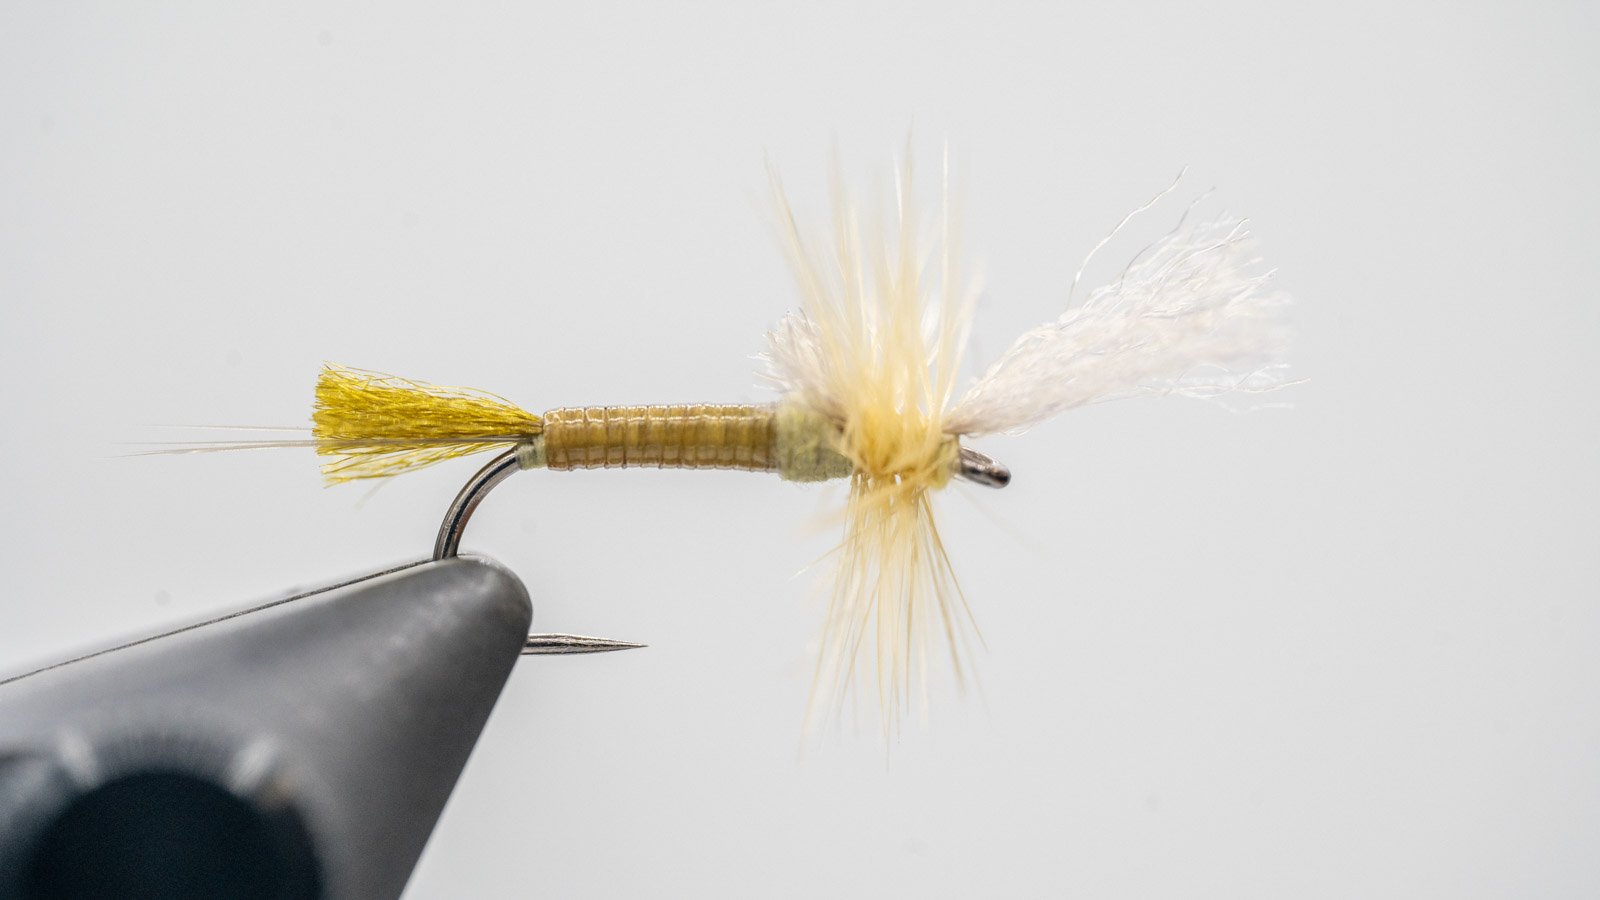
- Wrap the feather forward (about 4-5 times) and carefully tie it off behind the wing using three or four tight turns of tying thread. Trim the excess feather free and do a three-to-five-turn whip finish under the wing but in front of the hook eye; this will help prop up the wing. Trim your tying thread free, then apply a small drop of Solarez Bonedry to the thread head and cure it with a UV light.