Fly Tying: Magic Winter Tag Nymph
by Drew Daniels
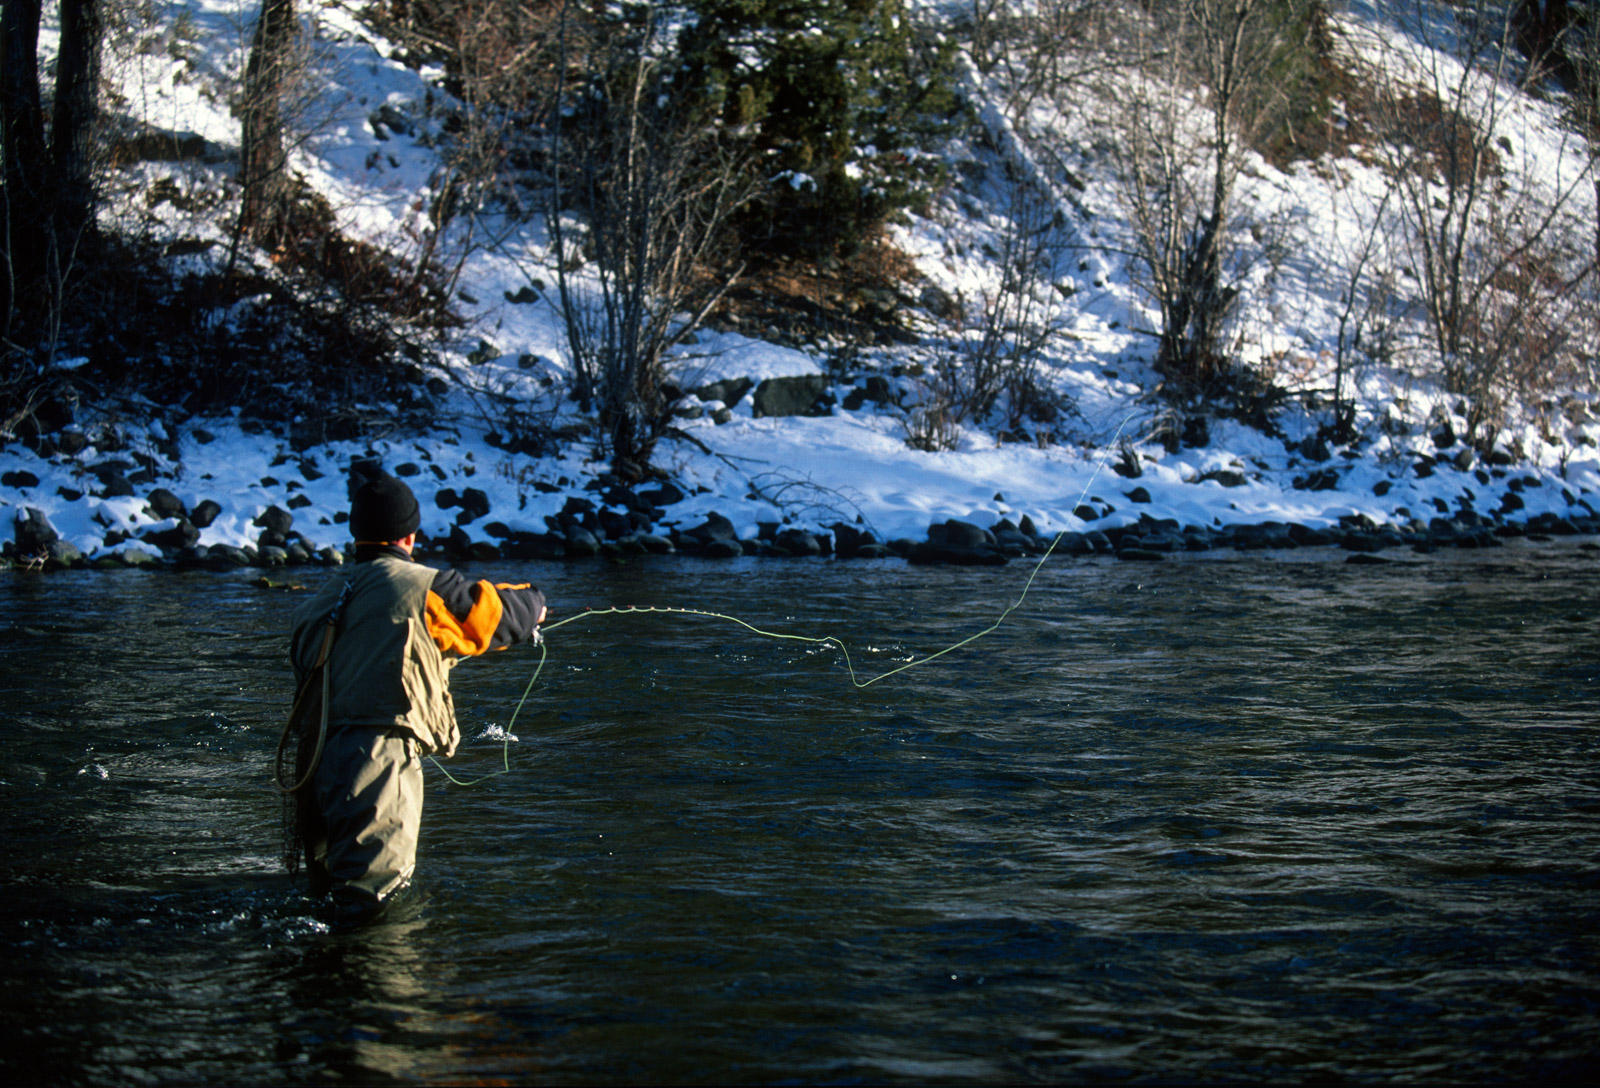
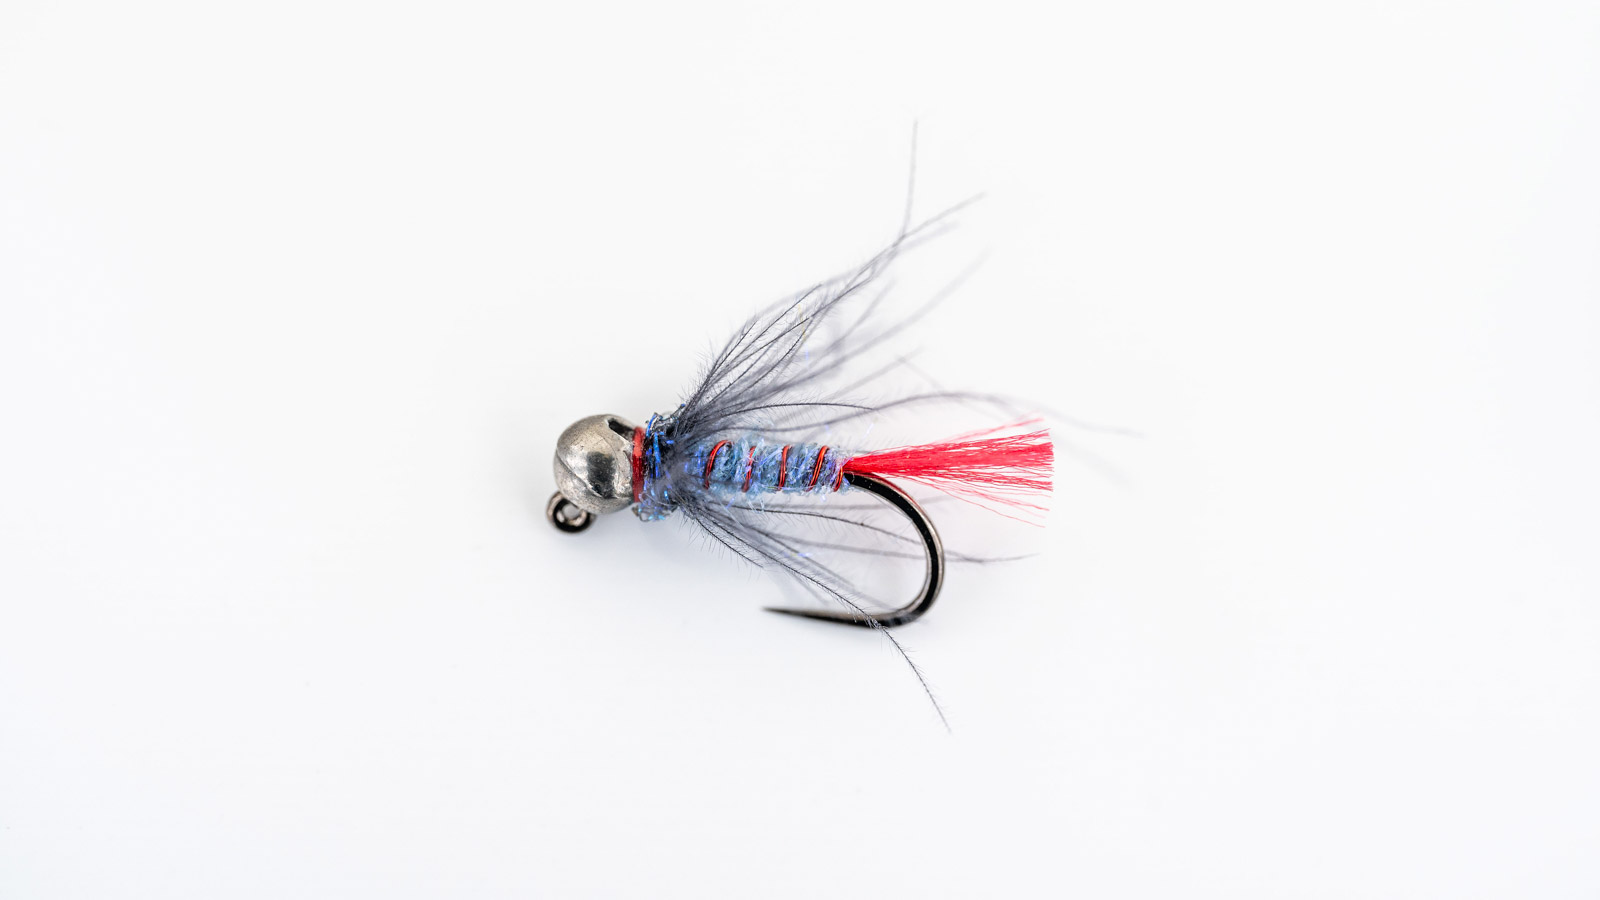
If you’re looking for serenity and beautiful views, winter can be one of the best times to fish in Montana. The fish do not stop feeding, but you must change tactics from your typical warm-weather fishing. A midge dry fly can put fish in the net on certain days, but nymphing is the most consistent way to catch fish in the wintertime. Whether you like to indicator or tight-line nymph, the fly I am about to show you will put fish in the net all winter. A larger version of this fly can make an excellent point fly in a two-fly rig, or a smaller size can make a great dropper behind a stonefly or small crawfish pattern.
This fly came to me over time while winter-fishing on our local rivers. Blue has been a great color for me, and red hotspots just work. I’ve never met a trout that didn’t like a CDC collar, and no one can argue with a jig hook and a tungsten bead. After some refining, multiple versions, and stealing a few ideas from some of my other favorite patterns, the “Magic Winter Tag Nymph” was born. This fly also works in different color combos, so tie some up in your confidence colors to find your favorite.
Materials
- Hanak 400, 12-18
- Black Nickle Slotted Tungsten Beads, 2.5- 4.0mm
- UTC Ultra Thread 70 Denier Red
- Small Ultra Wire Red
- Glo-Brite Floss Red
- Ice Dub UV Light Gray
- Ice Dub Midnight Haze
- Black or Dark Dun CDC
Instructions
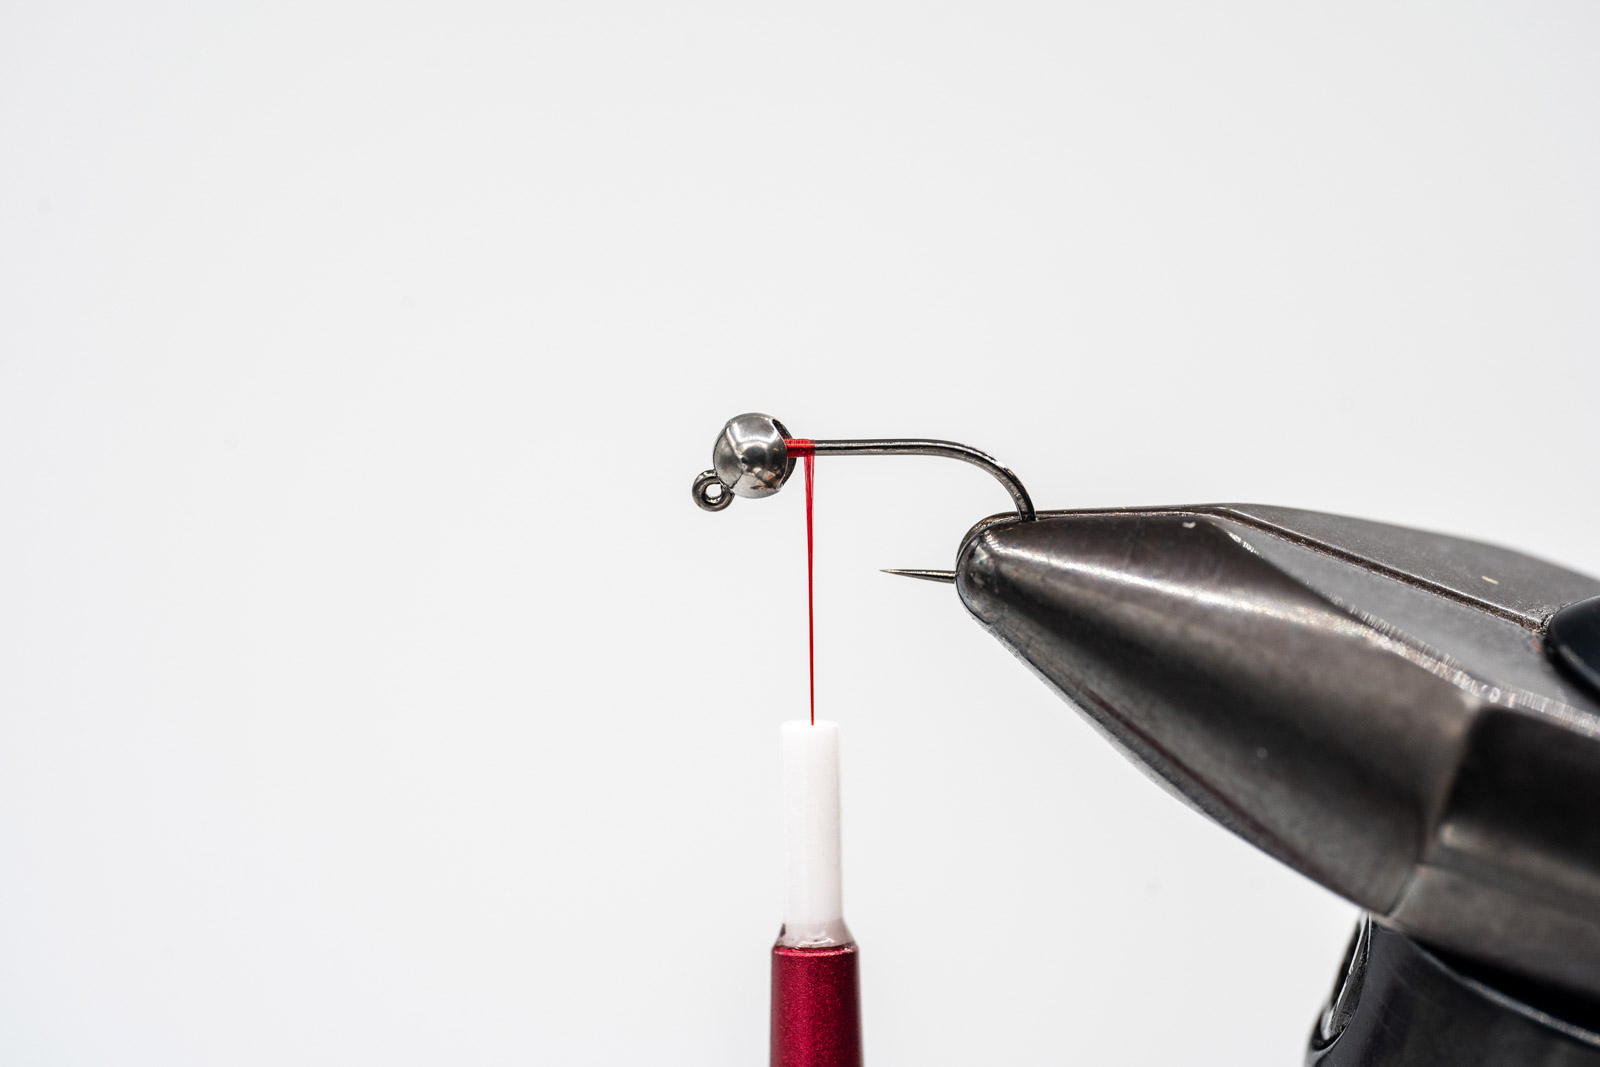
- Place the bead on the hook, small hole first, and put the assembly in your vise. Start your thread directly behind the bead using a jam knot and cut off the thread tag.
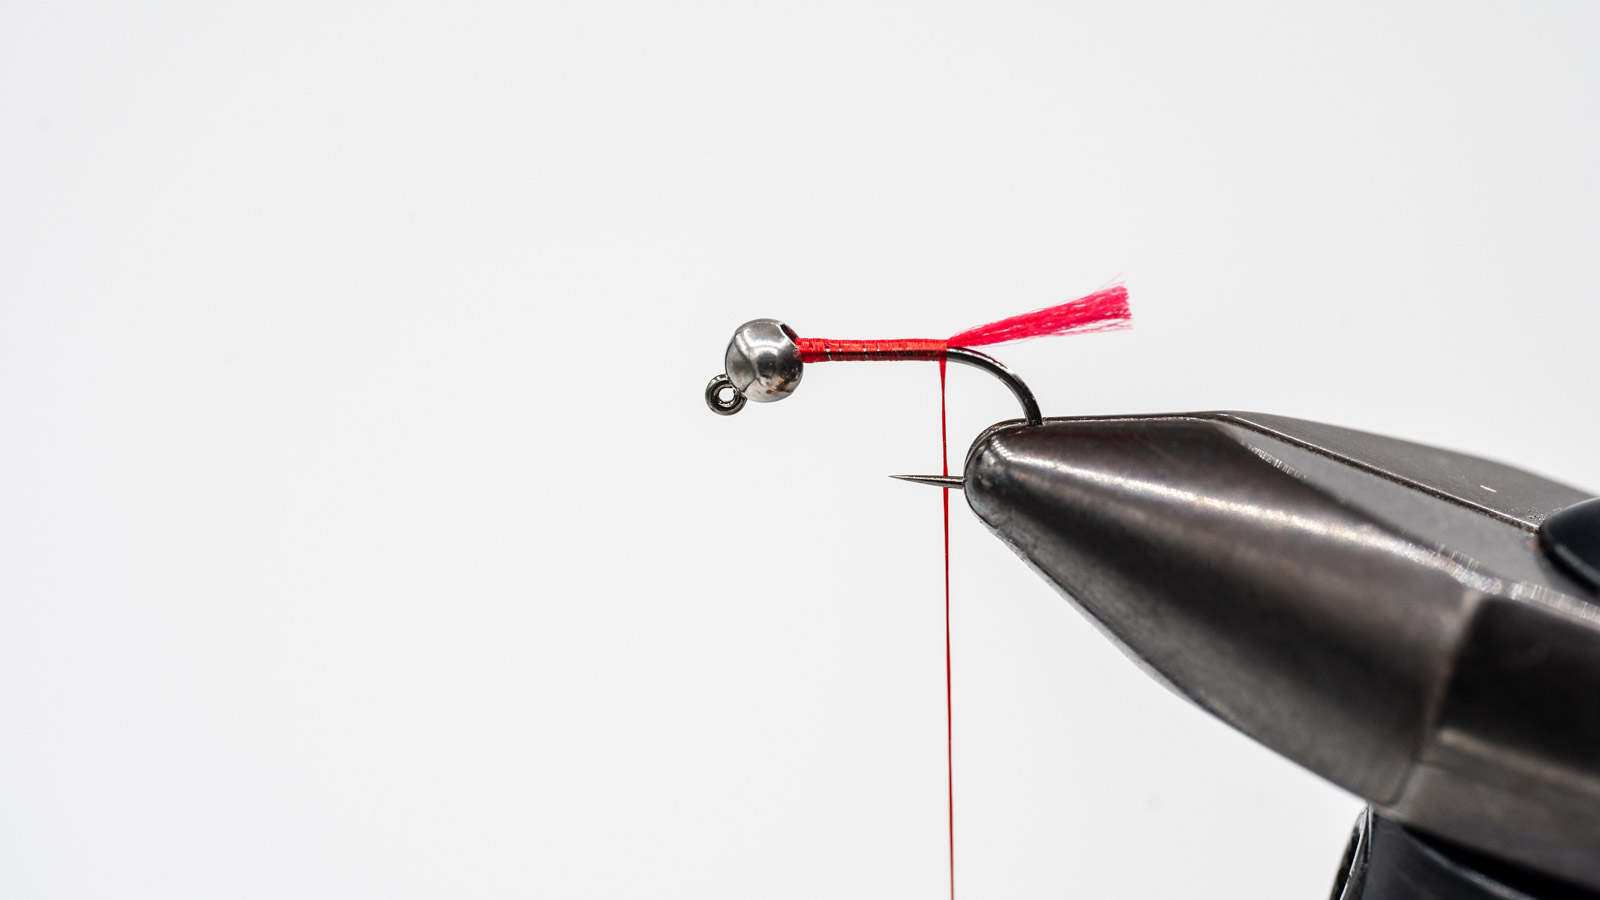
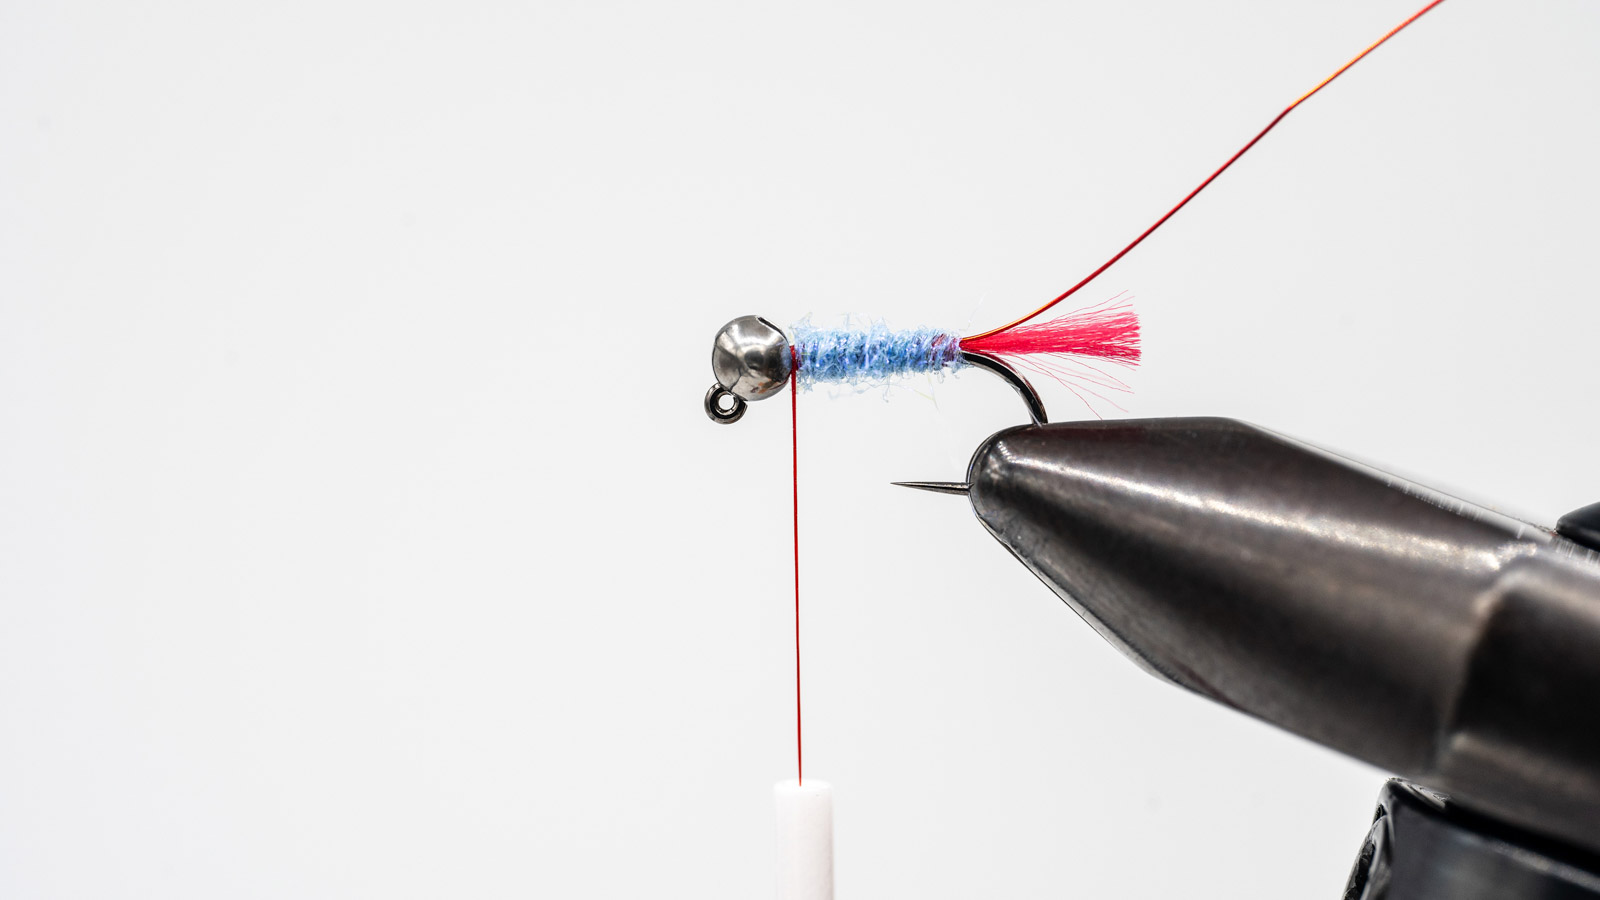
- Align four strands of Glo-Brite floss and tie them down the top of the hook’s shank, stopping at the start of the bend of the hook. Then, cut the tail to the length of the hook’s shank.
- Tie in a 6-inch piece of red wire to the hook and end with your thread at the back of the hook shank. Then grab a small pinch of the light gray Ice Dub and create a sparse 2-inch dubbing noodle. Wrap the dubbing noodle forward to create a slightly tapered body up to just behind the bead.
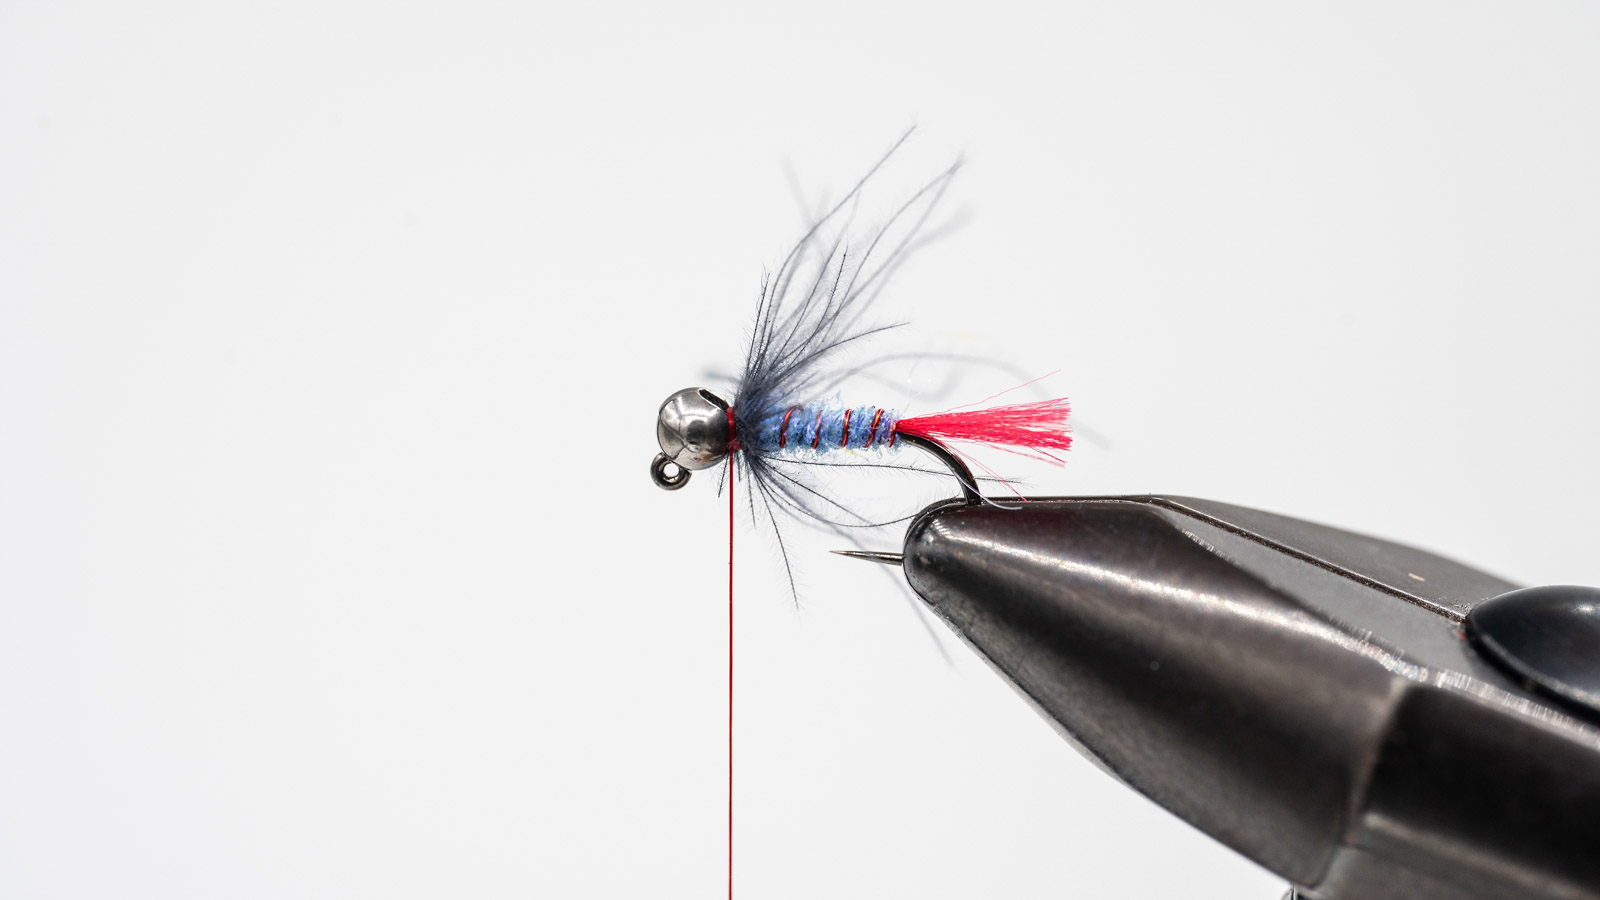
- Wrap the wire forward through the body using open spiral wraps just behind the bead, and tie it off. Helicopter the excess wire off. Then, create a dubbing loop and insert CDC feathers into the loop using a CDC clip. Once the CDC is in the loop, remove the clip and spin the dubbing loop up to create a short CDC rope. Wrap the CDC collar and stroke the fibers back with each wrap, ensuring you do not to trap any fibers as you create the CDC collar. Tie off the loop and cut the excess thread free.
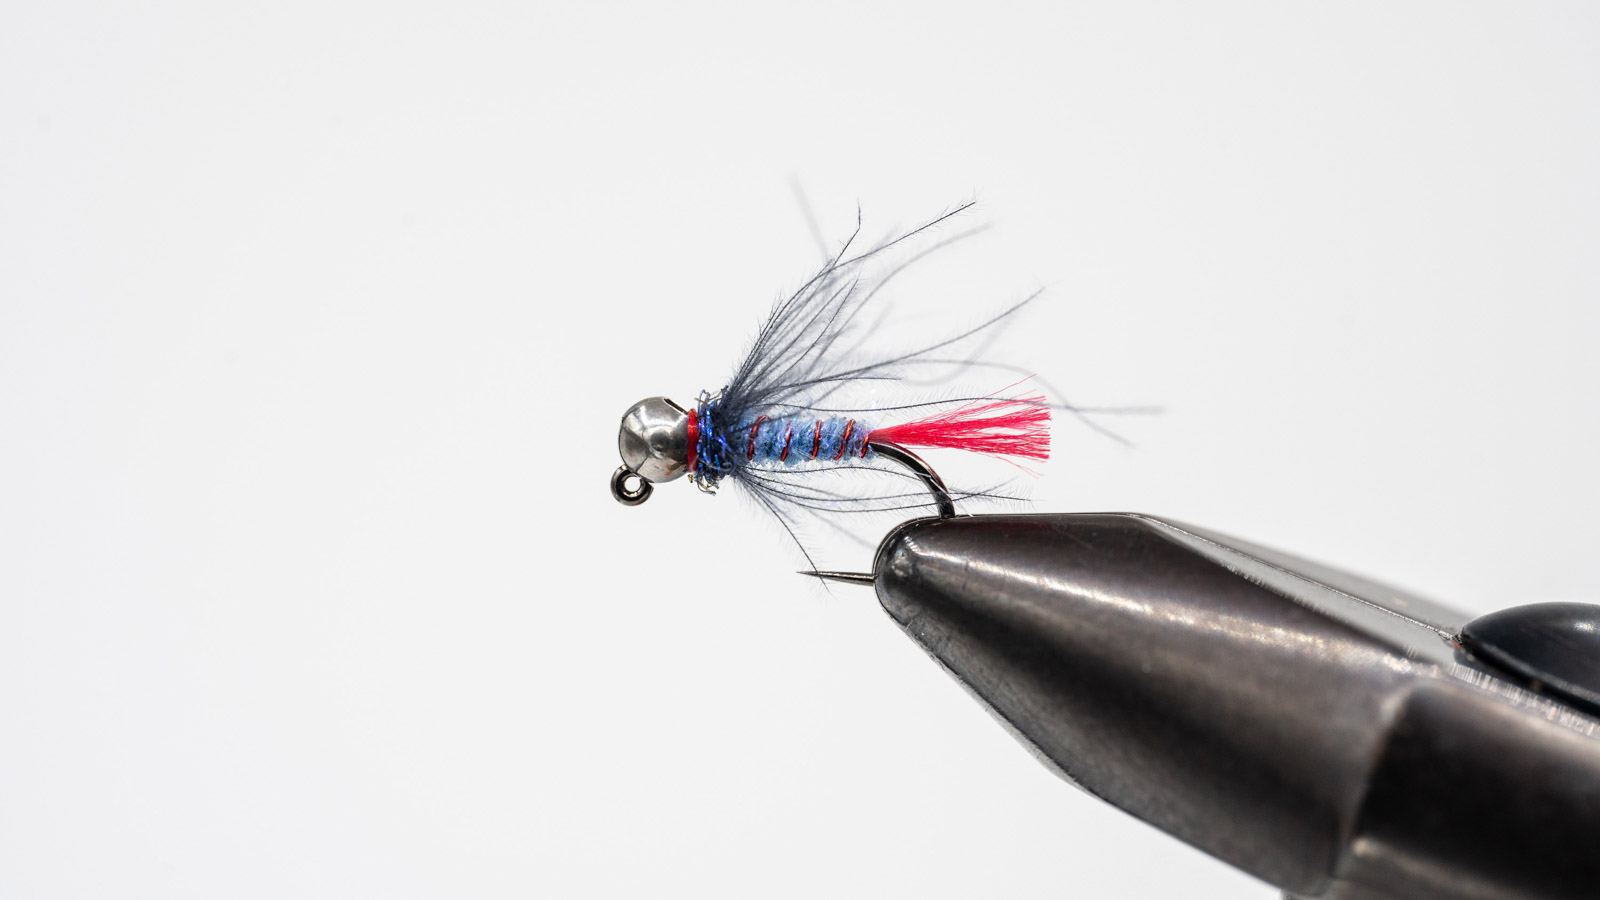
- Create a short dubbing noodle using a very small amount of the midnight hazel Ice Dub, then wrap it forward to make a short, darker blue collar. Using a whip-finish tool, do a series of 3 to 4 whip finishes to create a short red hotspot collar. When you are satisfied with the size of the collar, trim the thread and finish the fly with your favorite head cement or UV resin.